Use Blender for interior design
Use Blender for interior design in order to shorten your design time to market.
We will start with the floor plan layout as it will require dimensions labeling...
Use Blender for interior design in order to shorten your design time to market
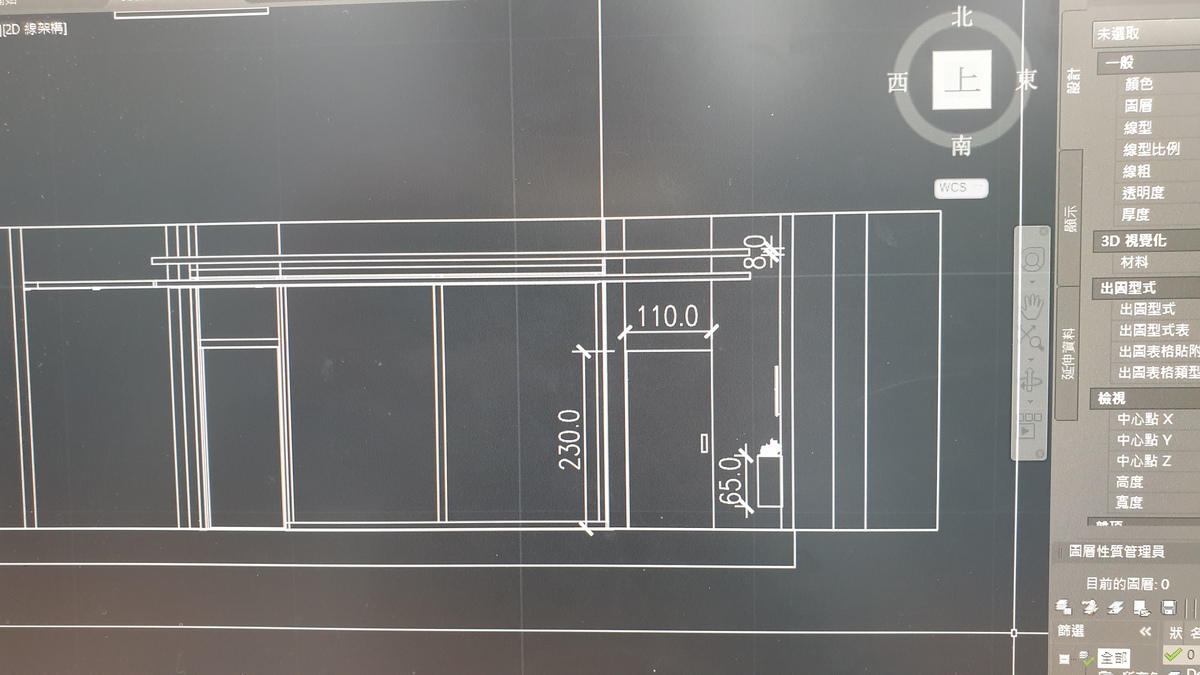
We will start with the floor plan layout as it will require dimensions labeling. Like any 3D architecture software, the dimensions labeling feature is also included in Blender 3D. Units are particularly important because the 3D models simulated will be physically built. In Blender 3D, the user interface is more intuitive than the 2D and with dimensions labeling, you can add actual dimensions to the drawings.
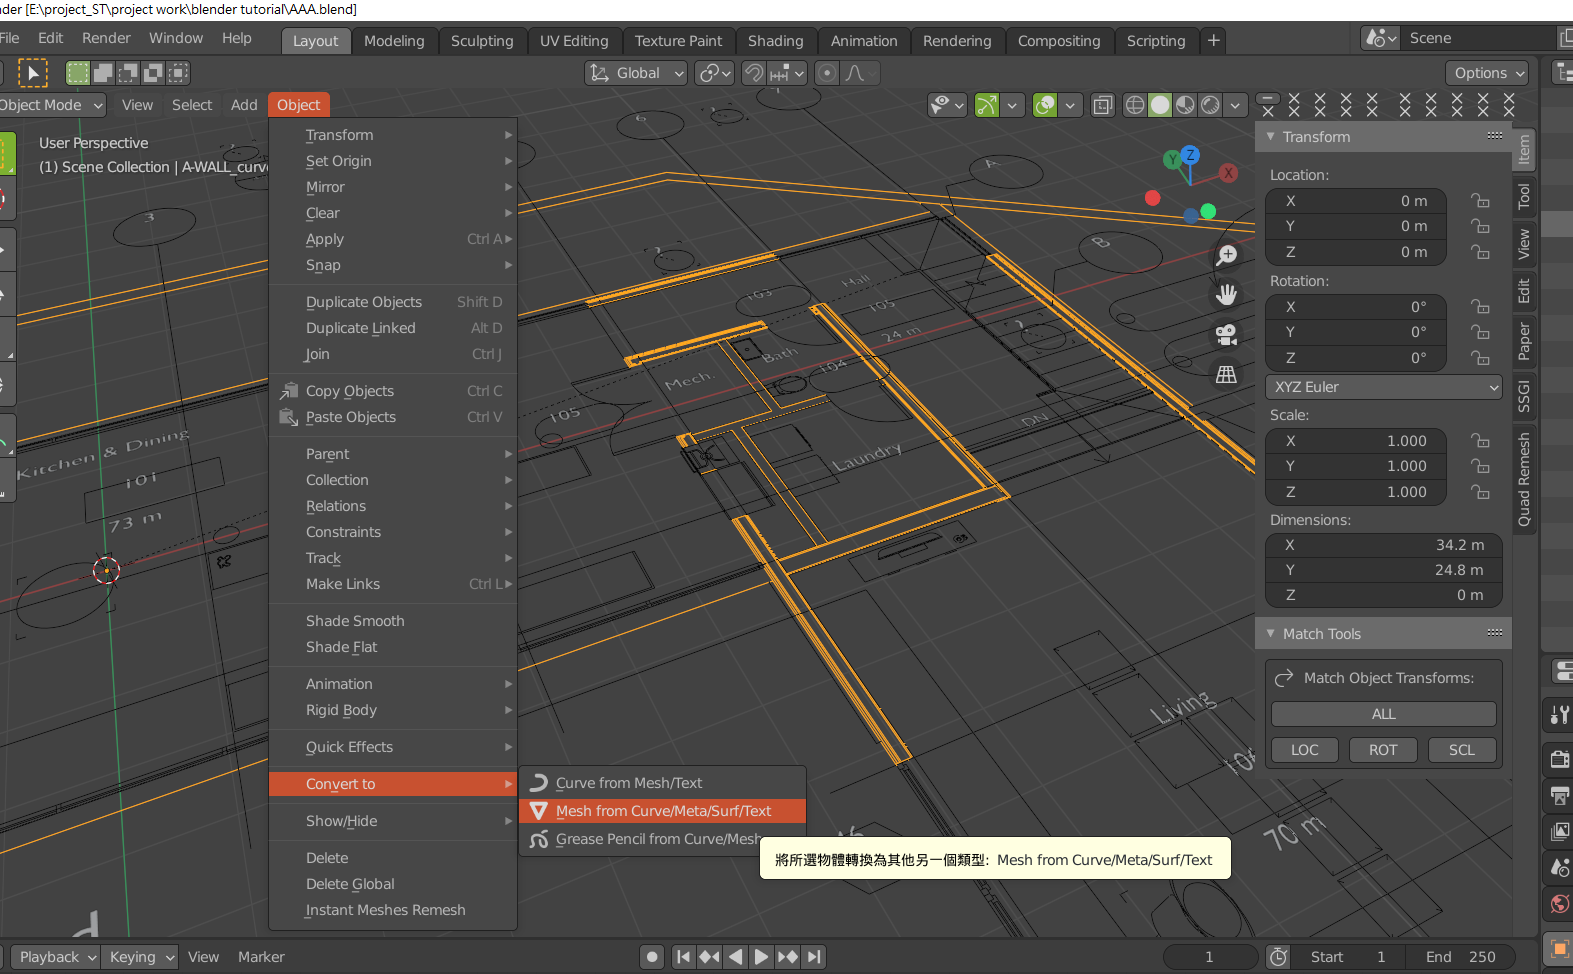
In Blender 3D, follow the menu path Select -> Select all by type -> Curve -> Object -> Convert to -> Mesh from Curve/Meta/Surf/Text to convert the imported DXF file to a CAD file.
Press the Tab key to enable Edit mode then select all (Press A key).

Press E key (Extrude) then Z to extrude along the Z-axis. Press 4 on the keyboard to set the extruded height to 4 meters.

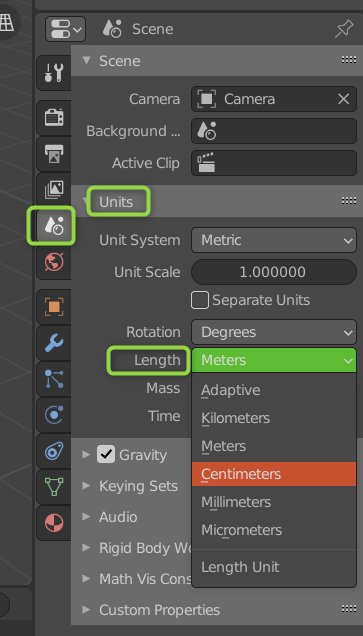
At the top right, click Scene on the toolbar then set the unit to the centimeter. For example, to enter 200 centimeters, press E on the keyboard then enter 200.
View dimensions change as you zoom in and out of the drawing.

Use Measurelt tools to label the dimensions. First open Preferences.

Select Add-ons then check the checkbox “3D View: Measurelt” to open the pane on the right side.

On the Measurelt tools pane, click “Show” then select a line segment; at the bottom of the Measurelt tools pane, click the Segment button to show the label.

In the Edit mode, press the “2” key to enable edge selection.


After editing, press Tab to return to the object mode.
In Blender 3D, the measure function on the tool's pane after pressing the T key allows you to do measurements. Press CTRL then select a point by clicking the mouse. Press the X key to remove the label.

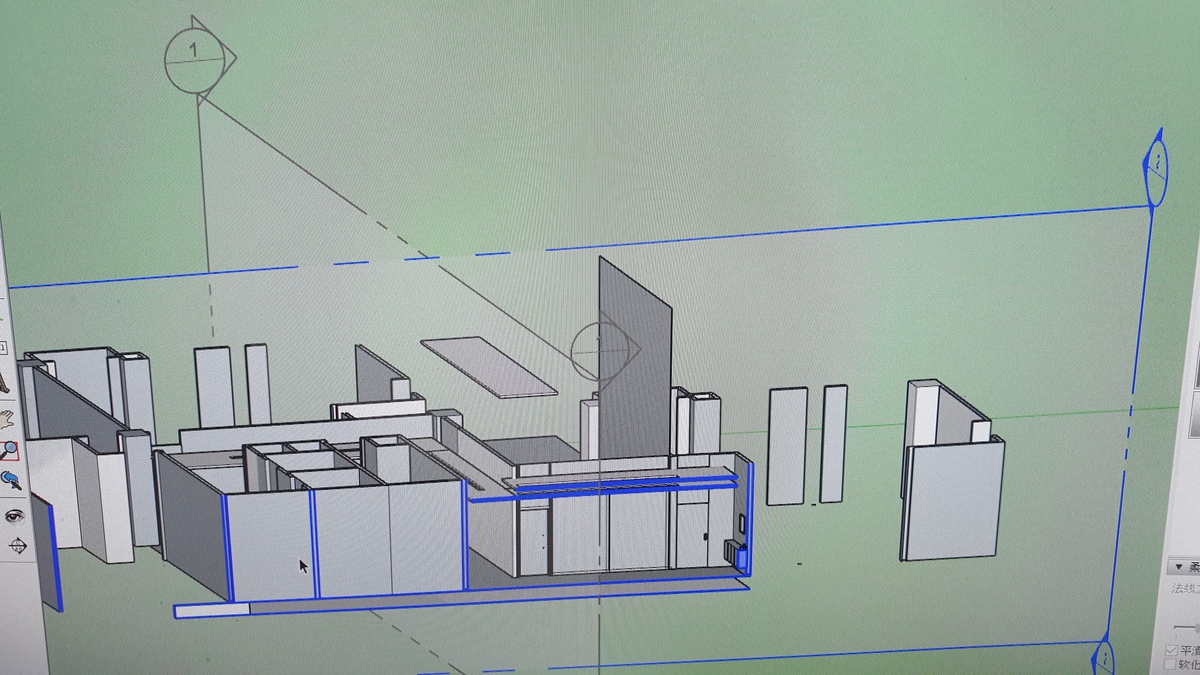
Download the model from Sketchup 3Dwavehouse then import the obj file to Blender 3D to select furniture as well as its materials. After calculations are done and the walls are well decorated, select meter as the unit then export dxf file to Sketchup 3Dwavehouse to view the cross-sections. Finally, export the dwg file to any CAD software to generate the floor plan and the 3D rendered image, which can then be viewed on Blender 3D on site.
A dwg file exported from Sketchup 3Dwavehouse to CAD software with dimension labels.
To perform UV mapping, first select Edit mode, then press A to select all. Press the U key to select Smart UV Project or Cube Projection.

Next, select the use node of this image, and press CTRL+T to show two extra nodes. Adjust Scale in Mapping to change the UV scale relative to the size of this image.


For a self-designed object, It would take time and effort to do UV mapping and search for materials.
Turn on Object Snap then to snap to a point, press and hold the Shift key, hold down the right mouse button and press the CTRL-key. You should see the cursor snapping to a point.
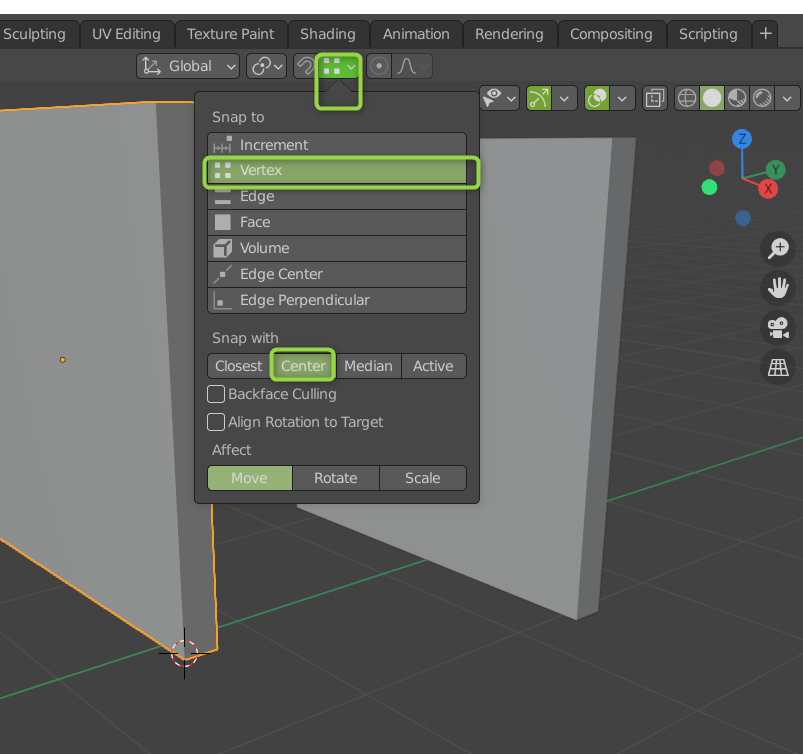

Now right-click the object then select Set Origin -> Origin to 3D Cursor, and the origin will be immediately moved to the location of the mouse cursor.


To snap to another object, press the G key, hold down the CTRL key then left-click a point close to the object.


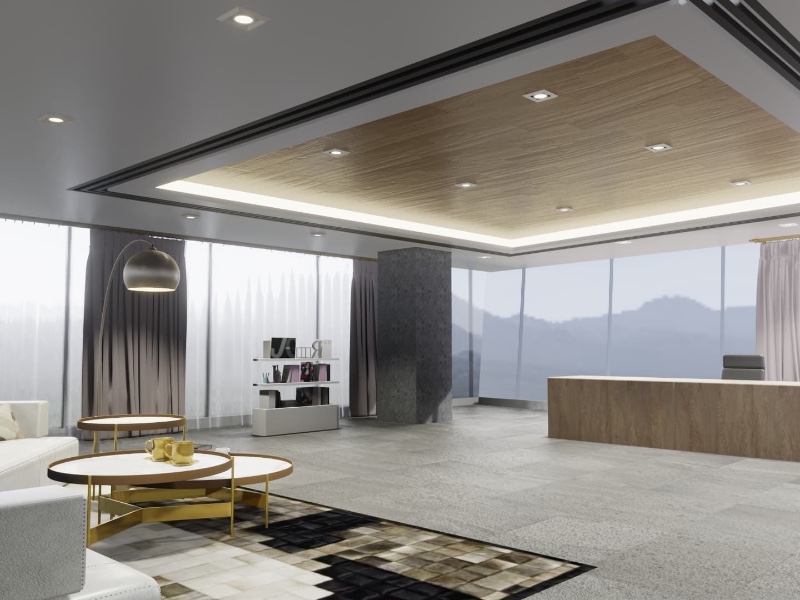
Display the render effect. We will discuss render lighting in another article.
